
Key Takeaways
- Setting the thermostat to a safe minimum temperature is the single most important step for preventing frozen pipes in an empty property
- Draining all water lines, toilets, and appliances eliminates the primary risk of burst pipes during deep freezes
- Sealing air leaks around windows, doors, and penetrations can meaningfully lower energy bills while protecting interior finishes
- A thorough exterior walk-through, including gutters, roof, and landscaping, prevents ice dams and structural damage
- Smart monitoring devices for temperature, water, and security give remote owners peace of mind through the off-season
- Shutting off the main water supply is a non-negotiable safeguard for homes that will sit unoccupied for weeks
- A detailed checklist completed before the final lockup saves money, stress, and emergency repair calls midwinter
A vacation home sitting empty through a long, cold stretch is a quiet gamble. Pipes contract, seals shrink, small animals look for warm hiding spots, and one unnoticed drip can turn into a flooded living room by February. The cost of neglect dwarfs the cost of preparation, every single time.
Owners who only visit a few weekends a year often underestimate how quickly winter weather can expose weak points. A loose shingle becomes a leak. A clogged gutter becomes an ice dam. A drafty window becomes a frozen pipe behind the drywall. The good news is that a focused weekend of work, done in the right order, can protect the property until spring.
This walkthrough takes you step by step through what to tackle, when, and why. Treat it as a checklist you can run through each fall, adjusted for your climate and the age of your property.
Start With a Full Interior Shutdown Plan
Before you touch a single tool, map out the shutdown. Walk every room with a notepad and list anything that uses water, anything that uses electricity you can unplug, and anything perishable you need to remove. A methodical pass prevents the classic mistake of driving away and realizing you left a coffee maker half full.
The interior shutdown has three priorities: temperature control, water management, and fire or electrical safety. According to This Old House, keeping your thermostat at a minimum of 55 degrees Fahrenheit is the baseline for keeping interior spaces warm enough to avoid freezing. Set it, then confirm the heating system is actually responding before you leave.
Here is what to include on your interior shutdown list:
- Unplug televisions, small appliances, and anything on standby power
- Empty the refrigerator, prop the door open, and clean the interior
- Remove all food from pantries that could attract pests
- Turn off the icemaker and empty the bin
- Lower water heater to vacation mode or shut it off entirely
- Test smoke and carbon monoxide detectors and replace batteries
Setting Up Smart Monitoring
Even the best preparation benefits from a second set of eyes. A basic smart thermostat, a water leak sensor near the heater and under sinks, and a cellular-connected temperature alarm cost a fraction of one burst pipe repair. Pair them with a reliable Wi-Fi setup or a cellular hub if the home has spotty service, and you will get an alert long before a small issue becomes a disaster.
How to Winterize a Vacation Home’s Plumbing System
Water is the number one enemy of an unoccupied property in winter. Everything else — rodents, dust, mildew, even heating failures — is a distant second, because nothing else can turn a quiet weekend absence into a six-figure insurance claim as quickly as a single burst pipe. Understanding how to winterize a vacation home starts with respecting that fact and treating every water-holding fixture, hose bib, trap, and appliance line as a potential hazard waiting for the first hard freeze.
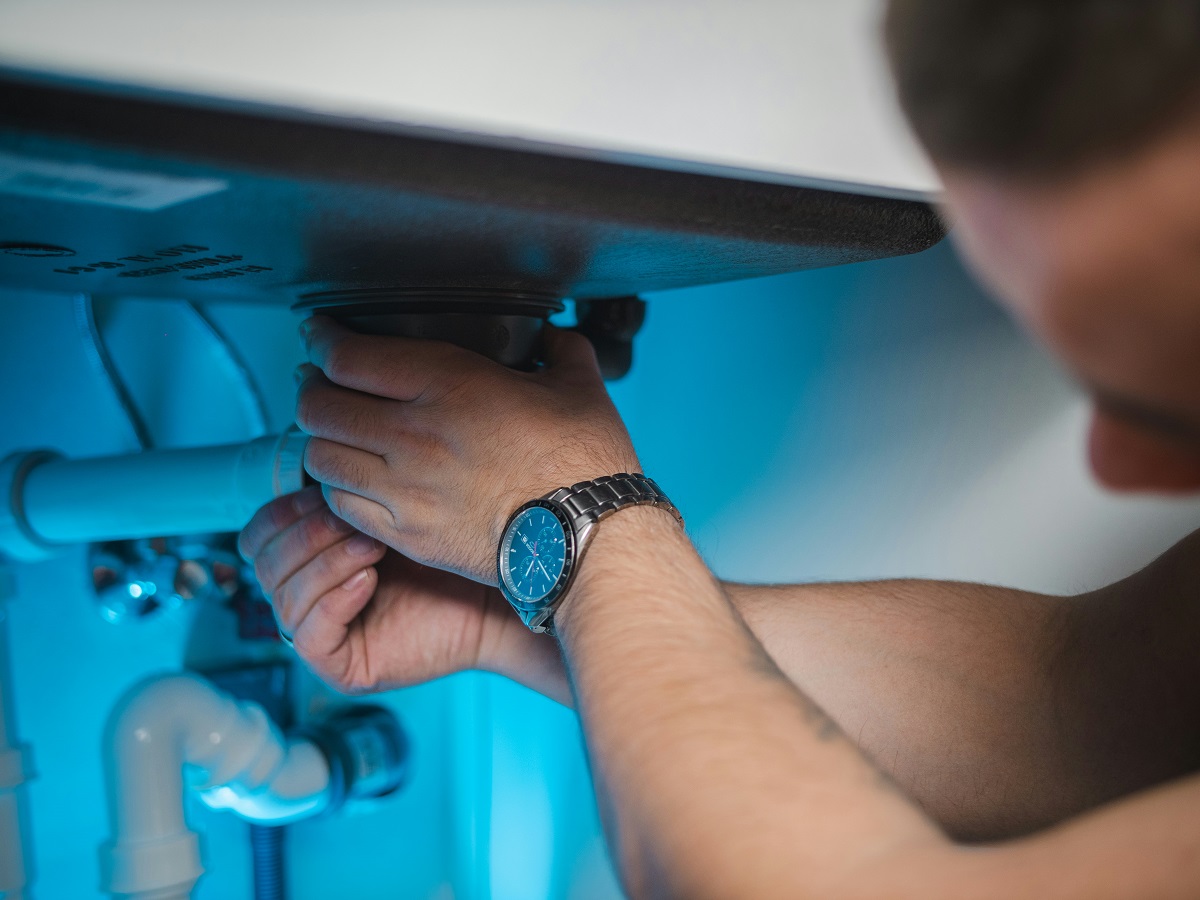
Start by shutting off the main water supply at the meter or well pump. If you have a pressure tank or booster pump, cut power to it at the breaker so it does not try to repressurize a dry system. Then open every faucet in the house, starting with the highest floor and working down, to let the lines drain by gravity. Do not forget the laundry sink, the basement slop sink, and the shower handheld wands. Flush every toilet to empty the tanks, hold the handle down until the bowl stops refilling, and remove standing water from the bowls with a sponge or wet-dry vacuum. According to Boston.com, any liquid remaining inside an unheated home will almost certainly freeze and often burst the pipes or vessels holding it, which is why thorough draining matters more than owners often realize. Even a cup of trapped water in a horizontal pipe run can split copper or crack a PEX fitting when it expands.
Work through this plumbing sequence carefully:
- Shut off the main water valve and the water heater, and drain the tank through the bottom spigot into a floor drain or hose routed outside
- Open all faucets, including outdoor spigots, utility sinks, and any basement or crawlspace bibs you rarely use
- Drain washing machine hoses and dishwasher lines, then run each appliance on a short cycle with the water off to clear internal pumps
- Blow out exterior irrigation lines with an air compressor set to a safe pressure, zone by zone, until only dry air exits each head
- Pour non-toxic plumbing antifreeze (the pink RV-grade kind, never automotive antifreeze) into every drain trap, toilet bowl, and tank to protect seals and keep sewer gases out
- Disconnect and store garden hoses indoors, and install insulated faucet covers on every exterior spigot as a final backup
Label your shutoff valves and water heater breaker with bright tags before you leave, so that whoever reopens the house in spring — you, a caretaker, or a plumber — can restart the system in the correct order without guessing.
When to Call a Professional
If your property has a complex system with radiant heat, a well, a pool, a hot tub, a boiler loop, or a secondary irrigation zone, hire a licensed plumber for at least the first season. These systems often have hidden low points, zone valves, and manifold drains that are easy to miss and expensive to repair if they freeze. Watch what they do, take notes, photograph every valve and drain port they touch, and ask questions about the order of operations. Many owners handle the job themselves in future years once they have seen it done correctly once, and some build a laminated checklist they tape inside the utility room door. The cost of that first service call — typically a few hundred dollars — is cheap insurance against the thousands of dollars in water damage, mold remediation, and lost rental income that a single overlooked line can cause.
Seal the Envelope and Cut Energy Waste
The building envelope is your home’s winter coat. Gaps around windows, doors, outlets, and attic hatches leak expensive heat and invite moisture. Even if you keep the thermostat low, a poorly sealed home works harder, costs more, and suffers more condensation damage.
Walk the perimeter on a cold, windy day if you can. You will feel the leaks with the back of your hand. Caulk, weatherstripping, and expanding foam are inexpensive and forgiving for a DIY job. Pay special attention to the attic, where warm air escapes and triggers ice dams on the roof above.
The payoff is real. According to Armadillo, sealing drafts and improving insulation can trim heating costs by 10 to 20 percent on monthly utility bills. That savings shows up every month the heat is running, not just during deep cold snaps.
Focus your sealing work in these spots:
- Window and door frames, especially older wood units
- Attic hatches and pull-down stair openings
- Electrical outlets and switches on exterior walls
- Dryer vents, bathroom fan housings, and range hood ducts
- Rim joists in the basement or crawlspace
- Gaps where pipes and cables enter the building
Take Care of the Exterior Before the First Freeze
Outside work gets miserable fast once temperatures drop, so tackle it early. Clean the gutters, check downspout extensions, and inspect the roof for lifted shingles or damaged flashing. A pre-winter roof patch is cheap. A midwinter leak repair involves ice, ladders, and emergency rates.
Trim back tree limbs that overhang the roof or any power lines running to the house. Heavy snow and ice can snap branches that looked perfectly healthy in October. If you want a thorough reference for the outdoor side of the job, this guide on how to prep your home exterior for extreme winter weather walks through the steps in detail.
Don’t ignore the ground around the foundation either. Water pooling against the house during a thaw can seep in and freeze again overnight, widening every crack it finds. This is one of the primary driveway cracking causes homeowners deal with every spring, and the same freeze-thaw cycle attacks walkways, patios, and driveway edges if drainage is neglected.
Give the yard itself a quick audit. Store patio furniture, drain fountains, cover the grill, and pull in any ceramic planters that will crack in a hard freeze. If you have been considering some curb appeal upgrades that boost functionality, fall is a smart window to install them before the ground hardens and outdoor work becomes a chore.
Protecting Decks, Docks, and Outbuildings
Sheds, detached garages, and lakeside docks need their own quick pass. Sweep decks clear of leaves so moisture does not sit against the boards all winter. Pull docks from the water where the local climate requires it, and store cushions, life jackets, and any fabric items indoors. A padlock check on outbuildings takes thirty seconds and keeps curious wildlife, and the occasional trespasser, out of your stored equipment.
Pest-Proof the Property Before You Lock Up
An empty, quiet house is exactly what mice, squirrels, and insects are looking for when the temperature drops. They need less than a quarter inch of gap to get inside, and once they are in, they chew wiring, nest in insulation, and leave droppings across every surface. A few hours of pest-proofing saves a spring cleanup that no one wants to do.
Walk the exterior and seal any opening you can find with steel wool, copper mesh, or hardware cloth backed by expanding foam. Pay attention to the spots where utilities enter, dryer vents, chimney caps, and the seam where siding meets the foundation. Inside, store any remaining dry goods in sealed metal or glass containers, never cardboard or thin plastic.
A short list of pest defenses worth setting up:
- Snap traps or enclosed bait stations in the basement, attic, and garage
- Chimney cap and damper closed tight
- Dryer vent cover with a working flap
- Screens on crawlspace vents in good repair
- Firewood stored at least twenty feet from the house
Prepping the Property for Peace of Mind

Once you winterize home systems and confirm the building is sealed, pest-proofed, and monitored, spend the last hour on the small details that make returning in spring pleasant rather than stressful. Take photos of every room, every shutoff valve, and the thermostat setting. Email them to yourself so you have a record if something goes sideways and you need to walk a neighbor or plumber through the house by phone.
Leave a short printed sheet near the main entry listing the main water shutoff location, the electrical panel location, the heating fuel supplier, and emergency contacts. If a caretaker, cleaner, or emergency responder ever has to enter, that sheet will save them fifteen minutes of searching.
Building a Reliable Local Contact List
Even with smart sensors, nothing beats a trusted human twenty minutes away. Line up a neighbor, a property manager, or a local handyman who can swing by after a major storm, check that the heat is still running, and clear snow from critical vents and exits. Offer to pay for the visits rather than relying on favors. A paid relationship means the person actually shows up when the weather turns ugly.
Share your monitoring app alerts with that contact if the system allows it. When a low-temperature warning fires at two in the morning, you want someone who can be at the door before the pipes reach freezing.
Final Walk-Through Before You Leave
The last lap through the house should feel almost ceremonial. Confirm every faucet is open, every drain has antifreeze, the thermostat reads your chosen setting, and the main water valve is closed. Check that exterior doors are locked, the garage is secured, and no windows were left cracked after you aired out a room.
Run through this short close-out list:
- Thermostat set and heating system cycling correctly
- Main water off, faucets open, traps treated
- Refrigerator empty, door propped, icemaker off
- All exterior doors and windows locked
- Smart sensors online and sending test alerts
- Outdoor furniture, hoses, and tools stored
- Lights on timers or smart plugs for a lived-in look
- Mail and package delivery paused or forwarded
Take one more slow lap through the quiet rooms. If something feels off, trust the instinct and check it. The five extra minutes at the door are worth more than any repair bill you might avoid.
Closing Thoughts
Closing up a seasonal property well is less about heroic effort and more about quiet, careful habits. Each step builds on the last, from draining the plumbing to sealing the envelope to lining up a trusted local contact. None of it is glamorous work, but the payoff is a home that greets you in April exactly the way you left it in October, with no surprises waiting behind the drywall.
Treat your first full winterization as a learning season. Keep notes on what took longer than expected, which valves were hard to find, and which rooms ran colder than you thought. Each year the process gets faster, the checklist gets sharper, and the peace of mind gets deeper.
A vacation home is meant to be a refuge, not a worry. An afternoon of preparation in the fall buys you a winter of calm and a spring arrival that still feels like a getaway.